主题
OpenCode
OpenCode 是开源的终端 AI 编程助手(类似 Claude Code),可以在命令行里调用多家大模型帮你读写代码、执行命令、完成开发任务。
它能同时接 Claude、GPT、Gemini,每个 provider 的 baseURL 按协议填,不要只写一个地址:
| 在 OpenCode 里配的服务 | baseURL |
|---|---|
| Claude / Anthropic | https://aicode.cat(不要 /v1) |
| GPT / OpenAI | https://aicode.cat/v1(要 /v1) |
| Gemini / Google | https://aicode.cat/v1beta(要 /v1beta) |
其它走 OpenAI 兼容协议的模型(DeepSeek、Kimi、GLM 等)跟 GPT 一样,填 https://aicode.cat/v1。
先到 创建 API Key 拿一把 Key。模型名以 主站控制台 为准,下面只举几个例子,不列全家桶。
按系统分步的旧页仍保留深链:Windows、macOS、Linux。
macOS / Linux
1. 安装 OpenCode
在终端执行:
bash
npm i -g opencode-ai验证:
bash
opencode --version
2. 创建配置文件
若 ~/.config/opencode/opencode.json 已存在,先删掉再写。没有就新建:
bash
mkdir -p ~/.config/opencodemacOS 可用:
bash
touch ~/.config/opencode/opencode.json && open -e ~/.config/opencode/opencode.json把上一节 Windows 那份 JSON 贴进去(三个 baseURL 仍然按协议分行)。Linux 用 nano / code 打开同一路径即可。
3. 验证安装
重新打开终端,运行 opencode,发一句「您好」,能正常回复即成功。
以下是 Windows
Windows
1. 安装 OpenCode
- 按 Win + R
- 输入 Powershell
- 打开 PowerShell(建议以管理员身份运行)并执行:
powershell
npm i -g opencode-ai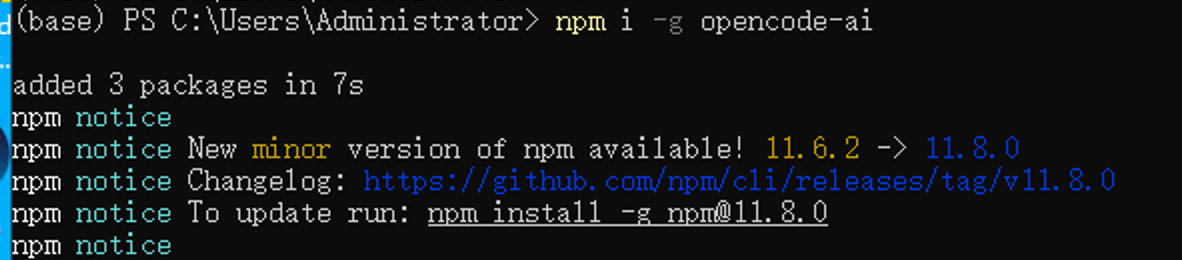
安装完成后,关闭并重新打开 PowerShell,然后验证:
powershell
opencode --version
如果遇到「在此系统上禁止运行脚本」:
- 以 管理员身份 运行 PowerShell
- 执行:
Set-ExecutionPolicy Unrestricted - 输入
Y确认后重试安装命令
2. 创建配置文件
先执行一次 opencode,这样会创建配置文件夹。Windows 上一般是:
text
C:\Users\<你的用户名>\.config\opencode\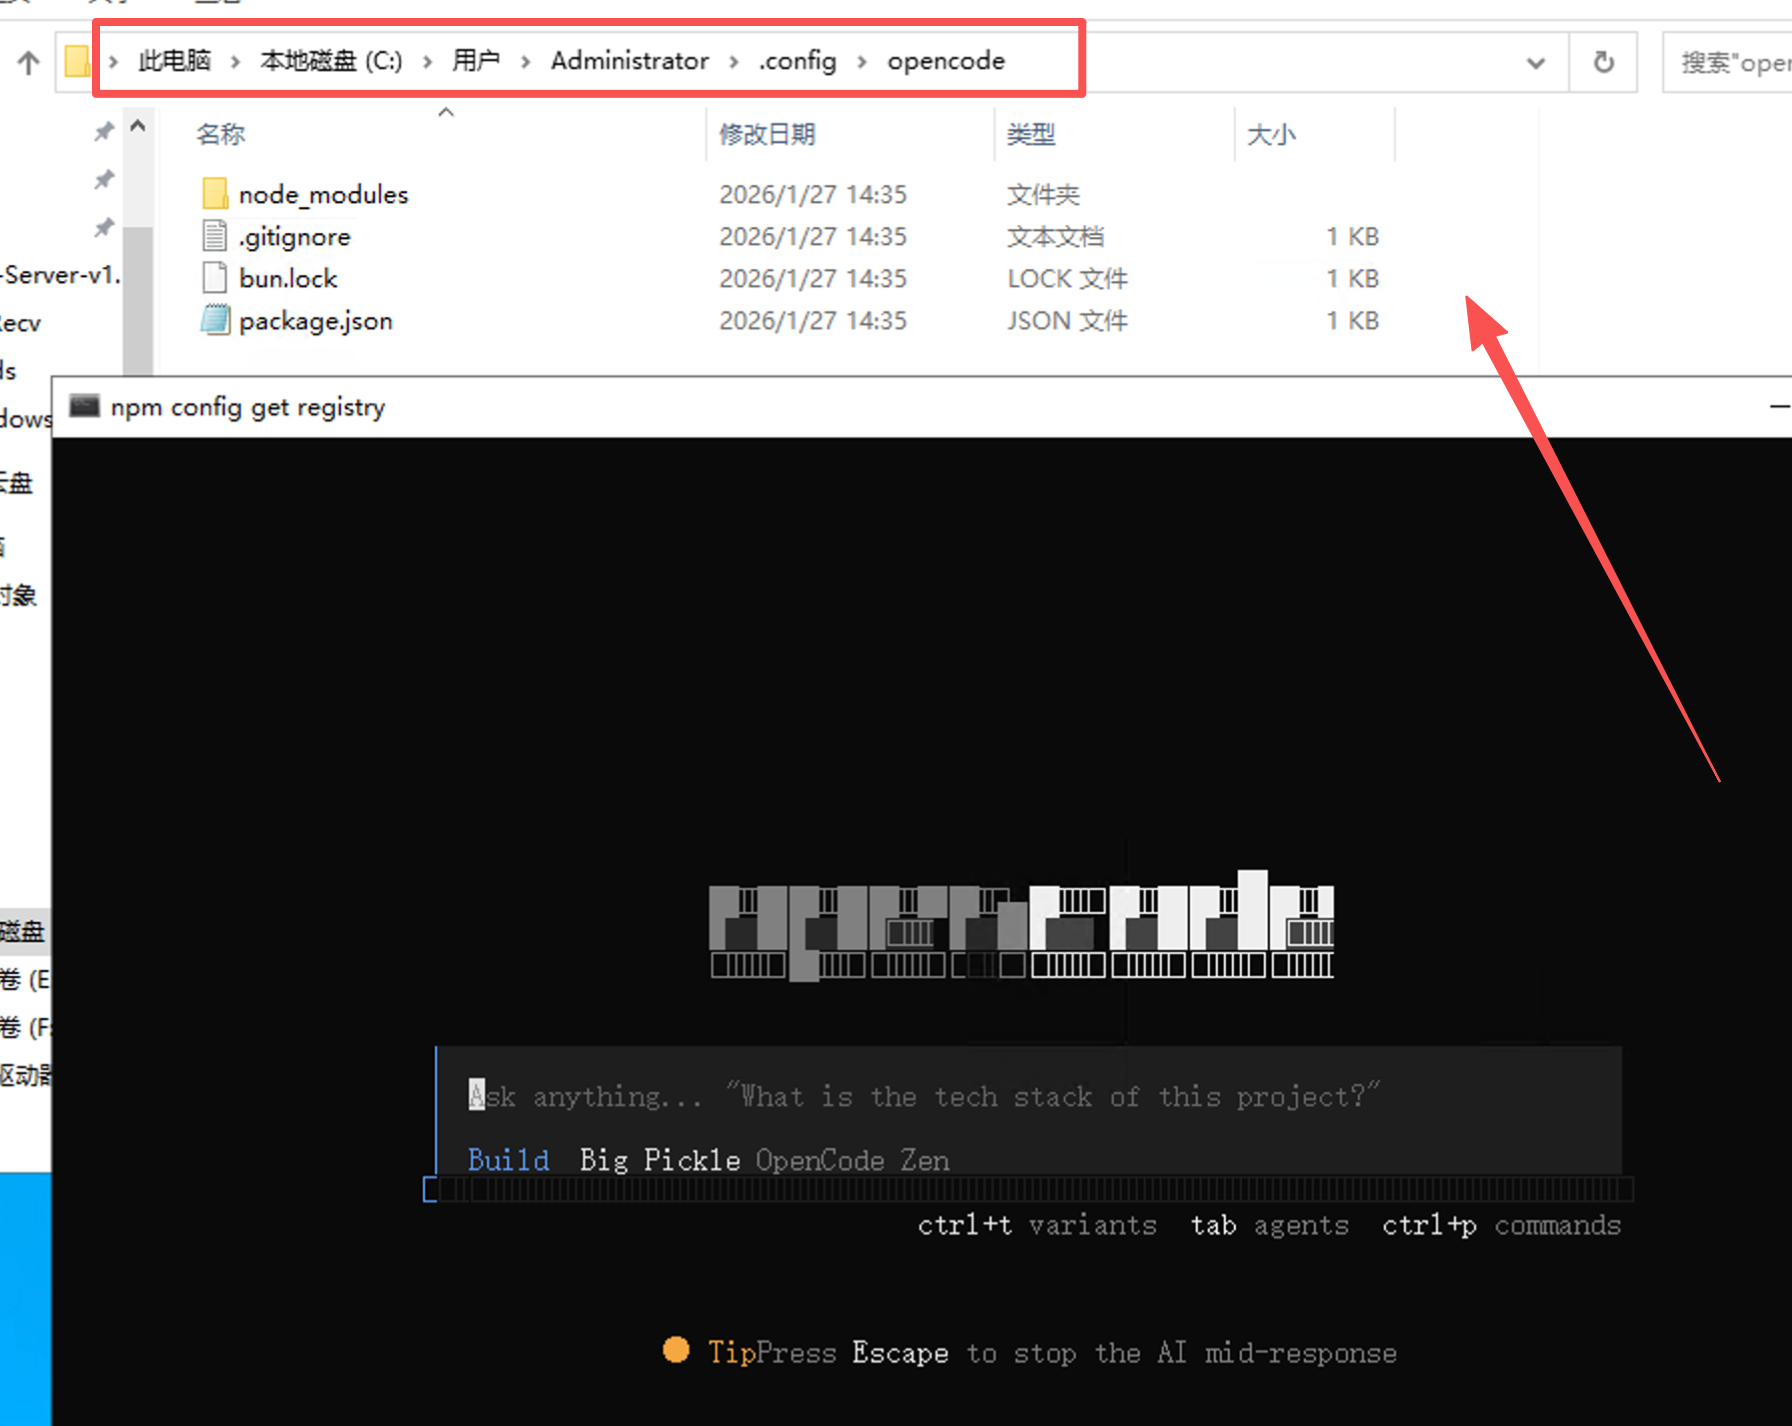
然后在该目录创建 opencode.json。把 在这里替换成你的_API_KEY 换成 密钥页 里的 Key。三个 provider 不要共用一个 URL:
json
{
  "$schema": "https://opencode.ai/config.json",
  "model": "aicodecat-anthropic/claude-sonnet-4-6",
  "provider": {
    "aicodecat-anthropic": {
      "npm": "@ai-sdk/anthropic",
      "name": "AiCodeCat Claude",
      "options": {
        "baseURL": "https://aicode.cat",
        "apiKey": "在这里替换成你的_API_KEY"
      },
      "models": {
        "claude-sonnet-4-6": {
          "name": "Sonnet 4.6",
          "tool_call": true,
          "temperature": true
        },
        "claude-opus-4-8": {
          "name": "Opus 4.8",
          "tool_call": true,
          "reasoning": true
        }
      }
    },
    "aicodecat-openai": {
      "npm": "@ai-sdk/openai",
      "name": "AiCodeCat GPT",
      "options": {
        "baseURL": "https://aicode.cat/v1",
        "apiKey": "在这里替换成你的_API_KEY",
        "setCacheKey": true
      },
      "models": {
        "gpt-5.5": {
          "name": "GPT-5.5",
          "tool_call": true,
          "reasoning": true
        }
      }
    },
    "aicodecat-gemini": {
      "npm": "@ai-sdk/google",
      "name": "AiCodeCat Gemini",
      "options": {
        "baseURL": "https://aicode.cat/v1beta",
        "apiKey": "在这里替换成你的_API_KEY"
      },
      "models": {
        "gemini-3-pro-preview": {
          "name": "Gemini 3 Pro Preview",
          "tool_call": true,
          "reasoning": true
        }
      }
    }
  }
}
Claude 必须是站点根 https://aicode.cat。
想用 oh-my-opencode 的三个主 Agent(Sisyphus / Atlas / Prometheus)时,可在配置根上加 "plugin": ["oh-my-opencode"]。不是接入所必需。
3. 验证安装
重新打开 PowerShell,运行:
powershell
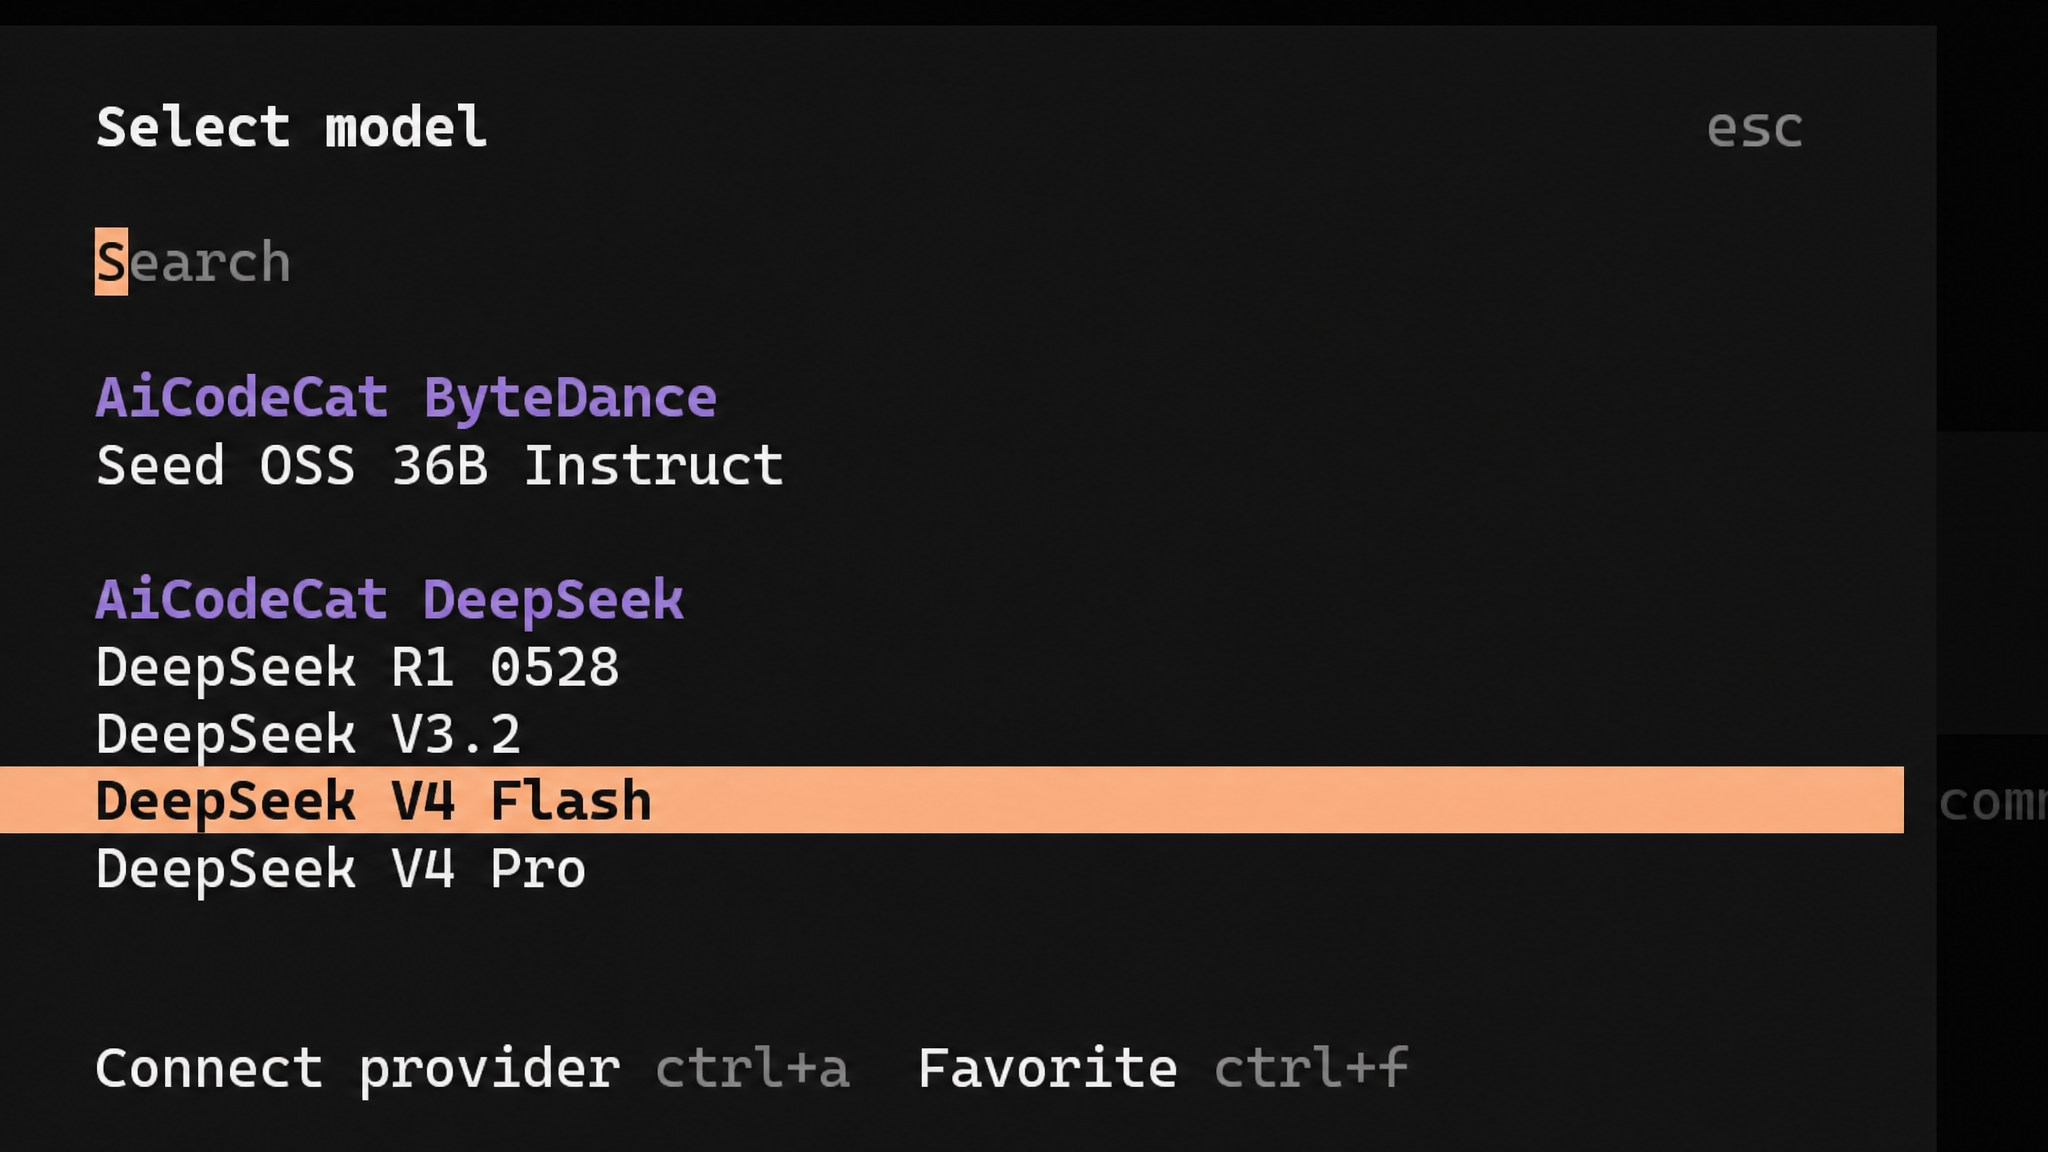
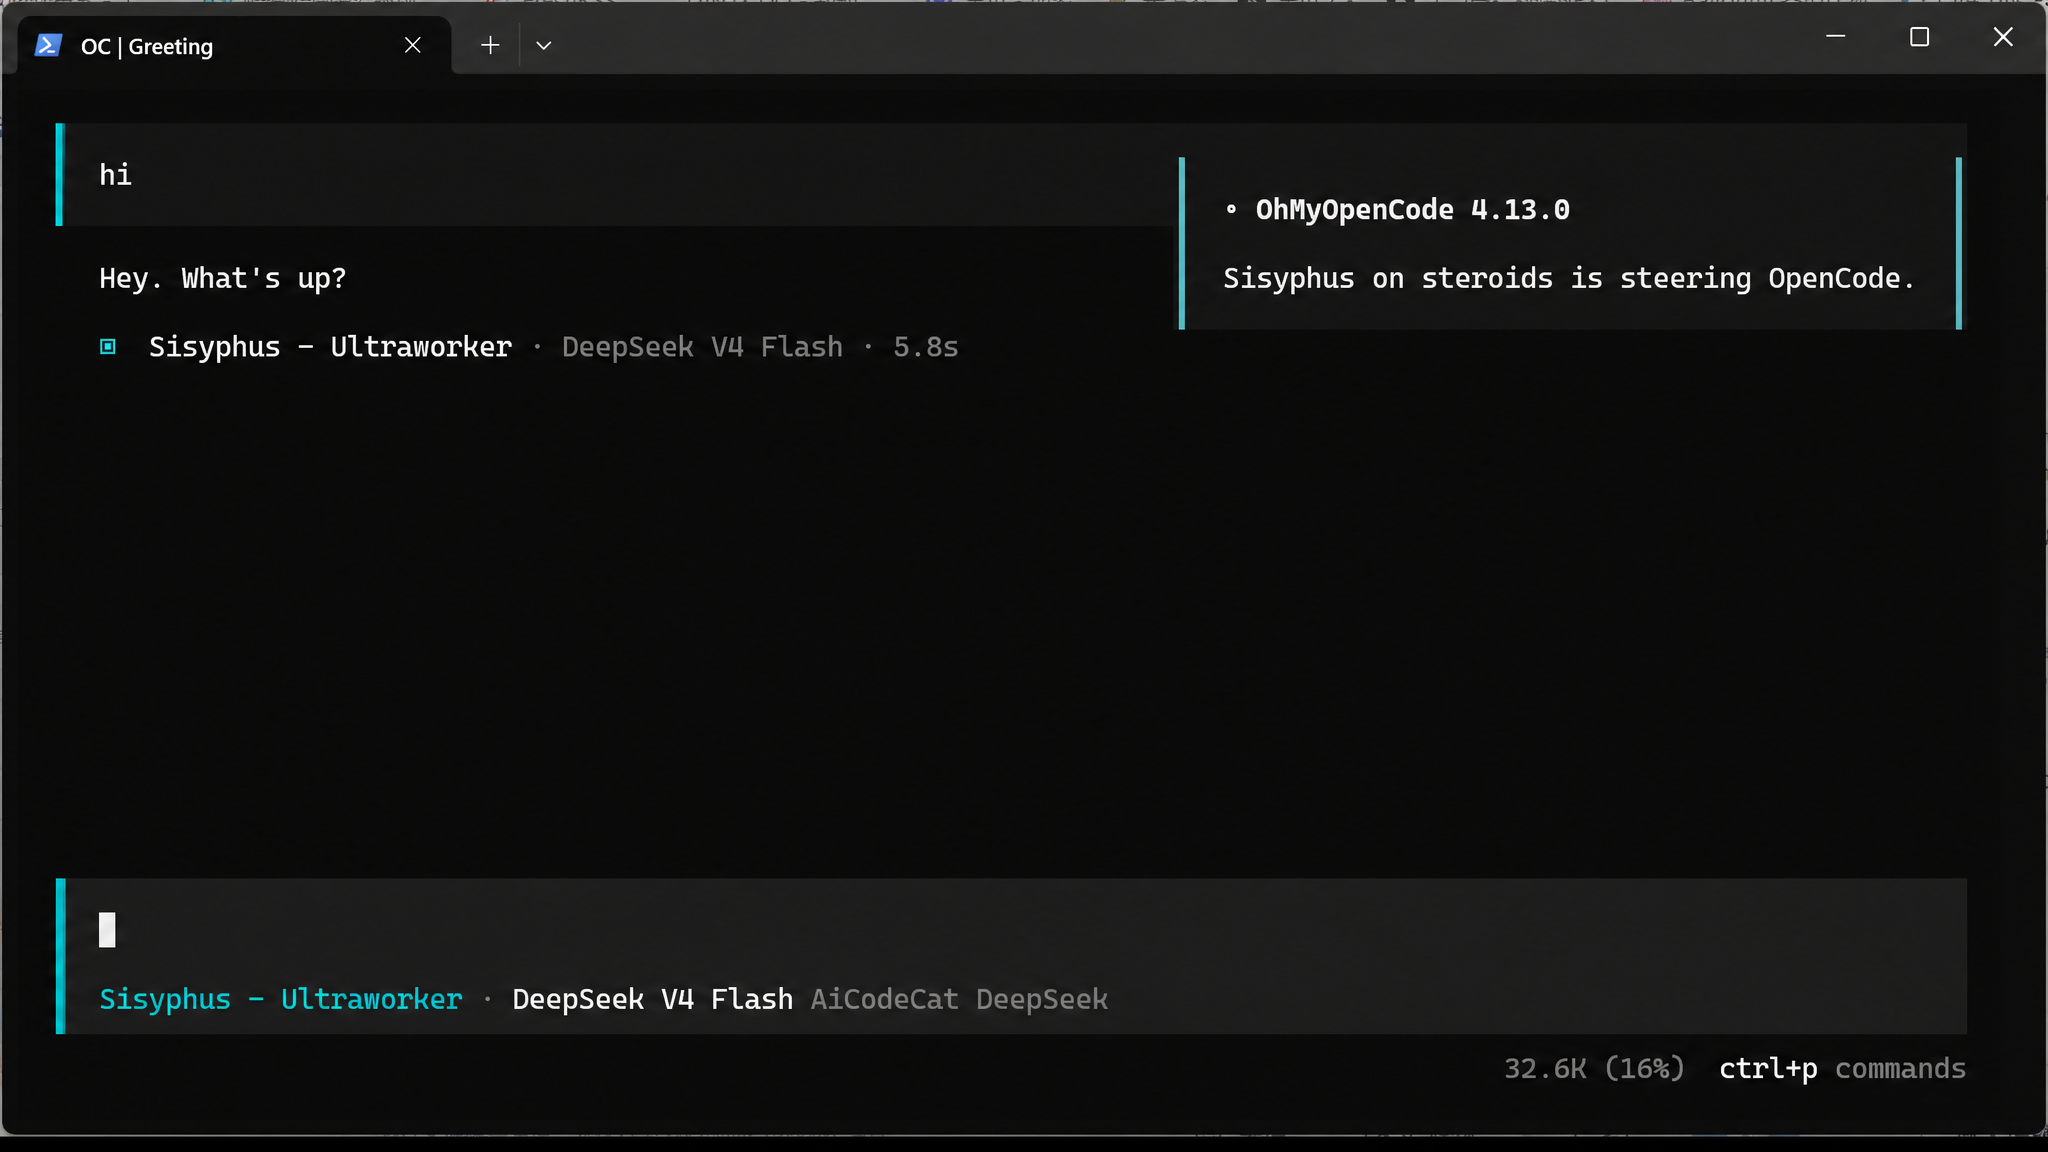
opencode输入 /models,能看到刚才配的 AiCodeCat 供应商即配置成功。对话框里发一句「您好」,能正常回复即可。失败先看 常见报错。
如何使用
OpenCode 装了 oh-my-opencode 之后有三个主 Agent,直接对话:
- Sisyphus(西西弗斯):主执行者,能写代码、能委派
- Atlas(阿特拉斯):总指挥,不直接写代码,只委派并验收
- Prometheus(普罗米修斯):规划师,只写计划,不写代码
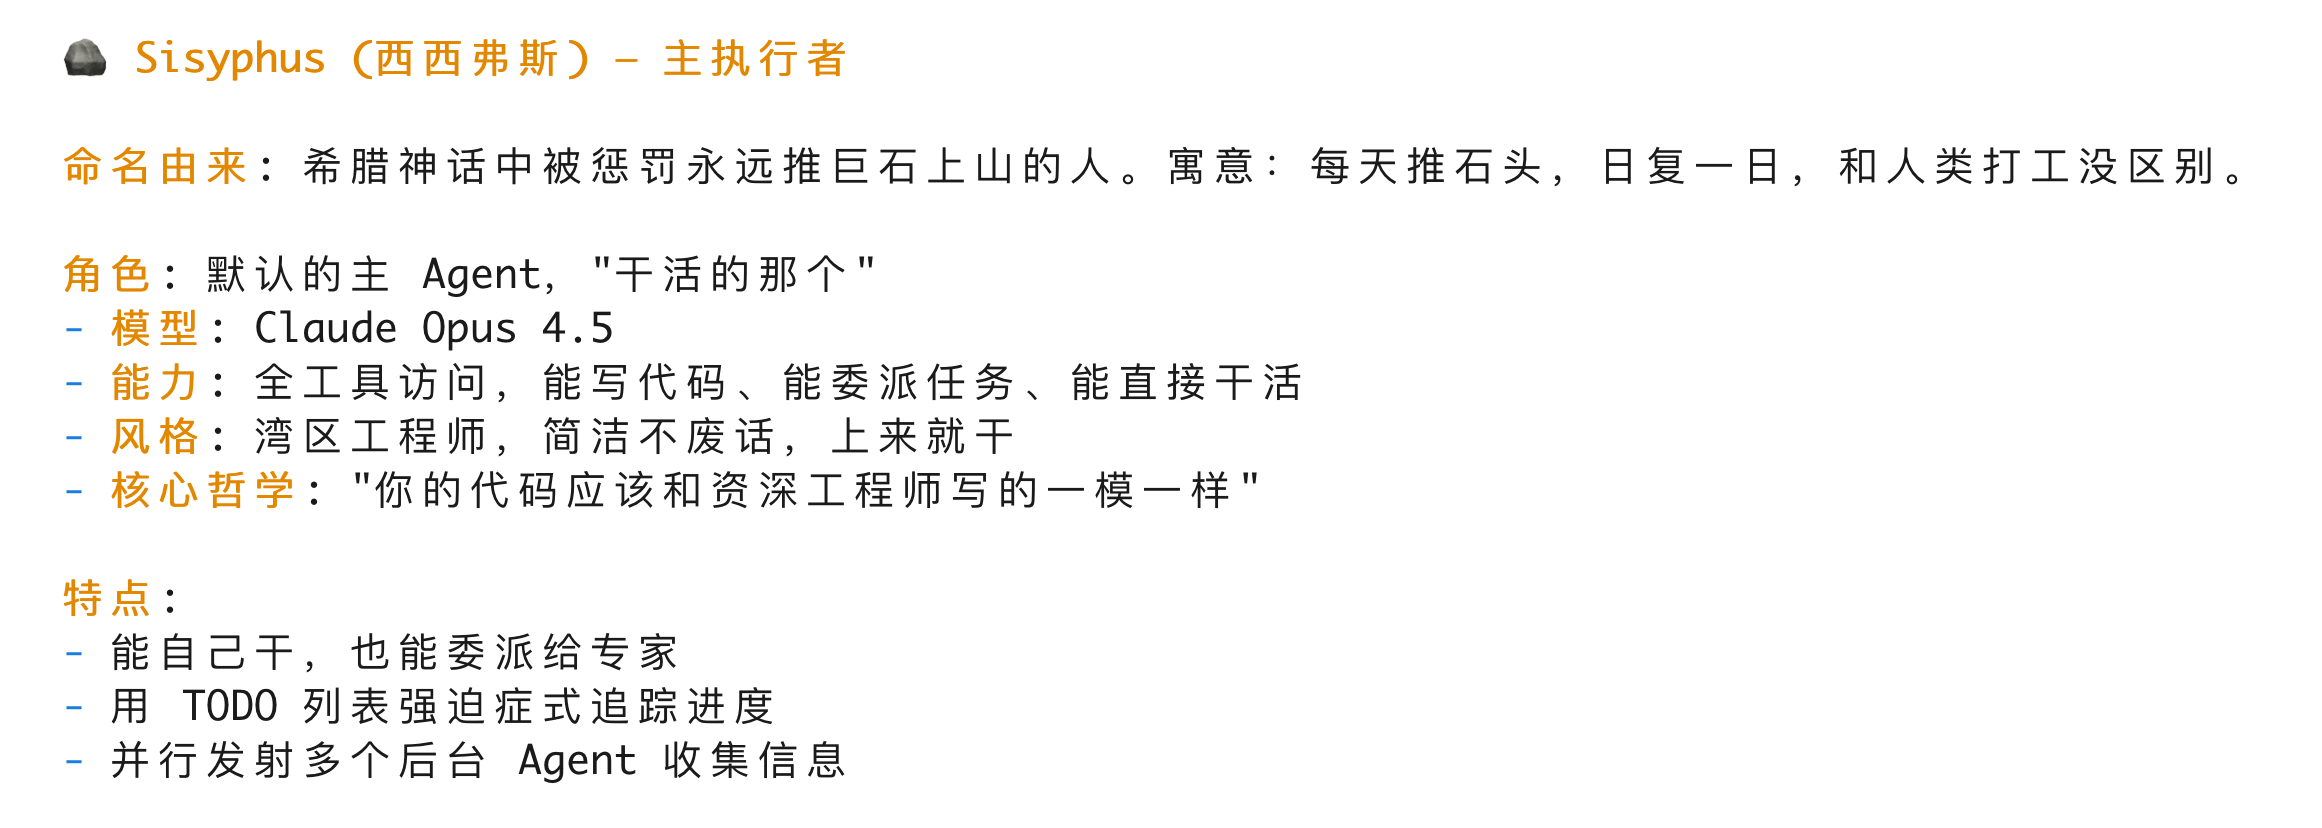
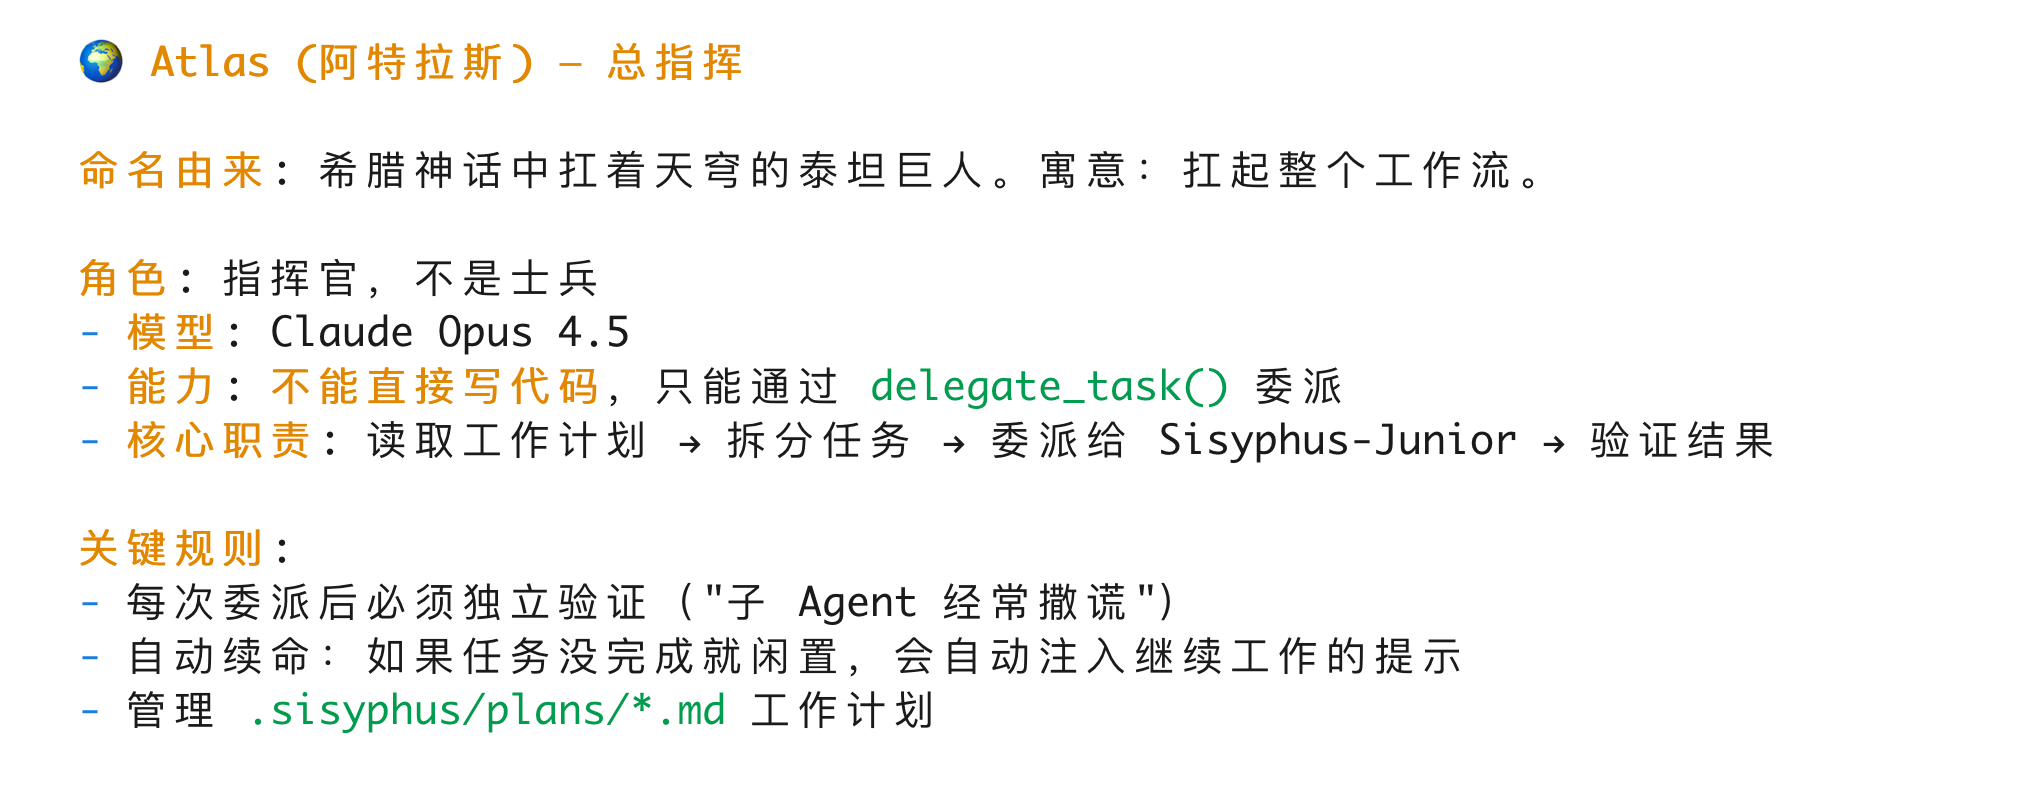
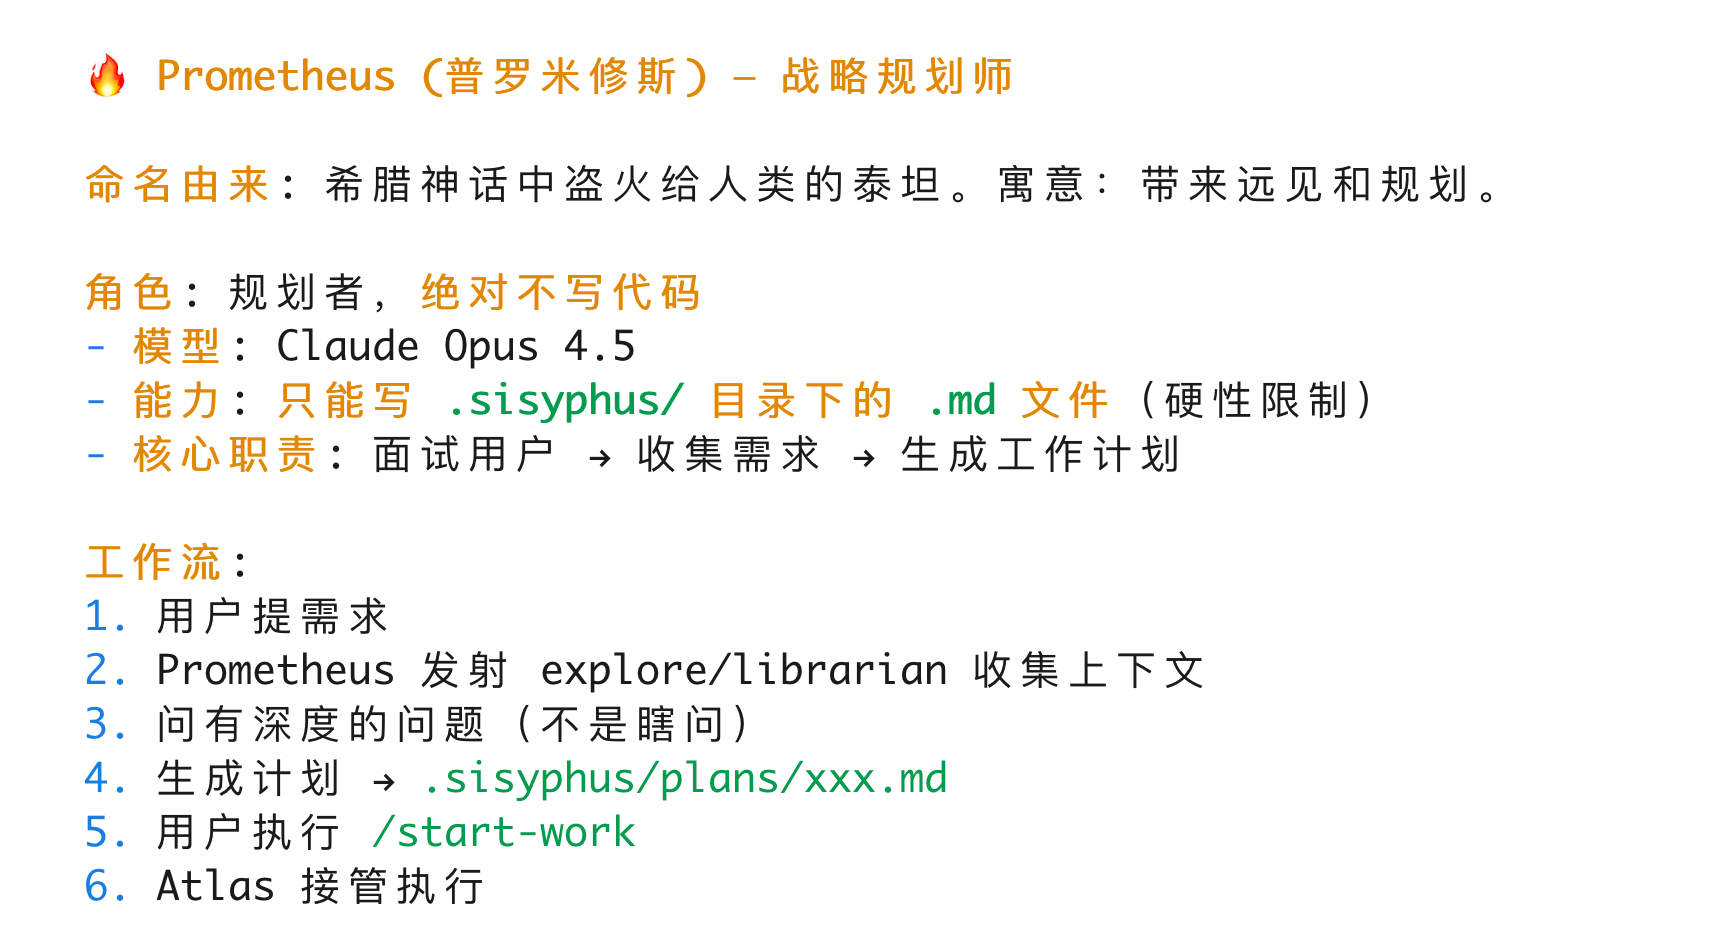
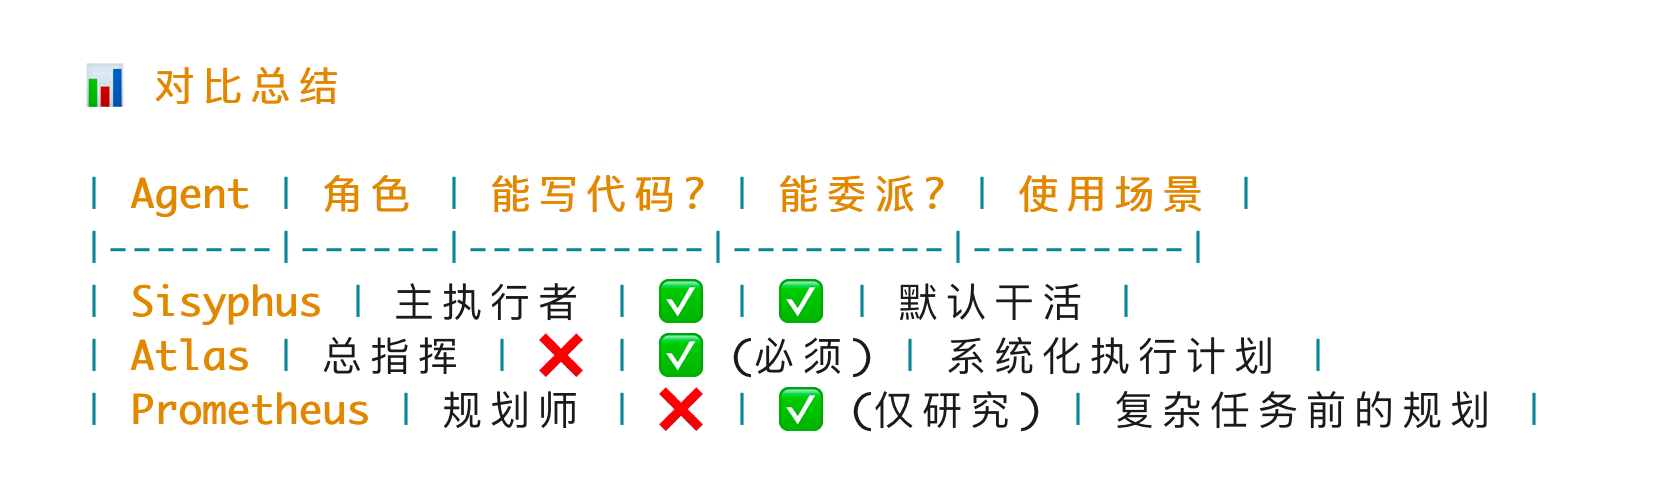
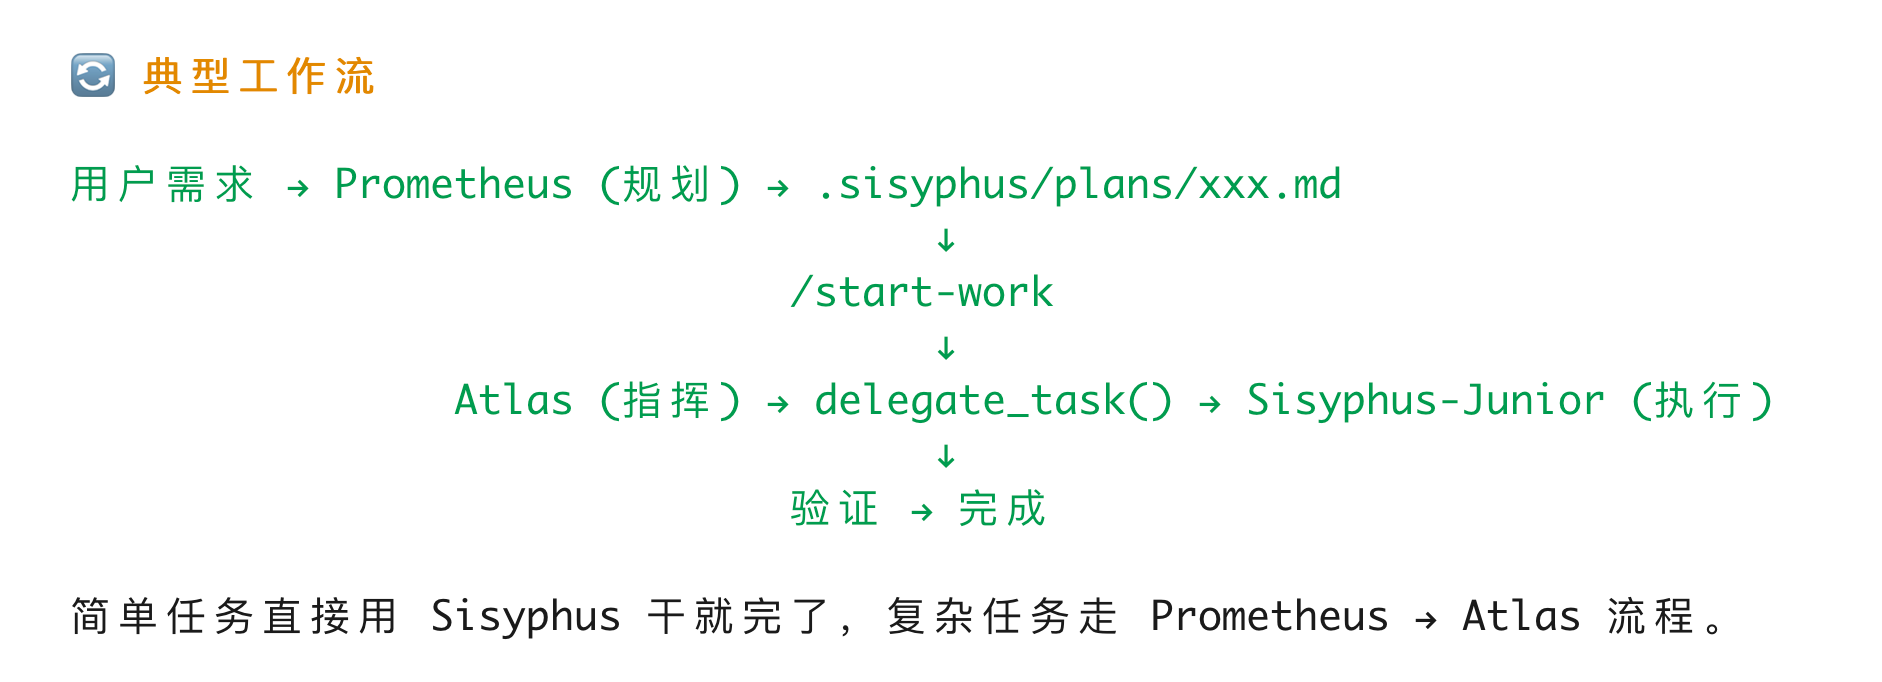
简单任务直接用 Sisyphus。复杂任务走 Prometheus 规划 → /start-work → Atlas 指挥执行。
常见问题
BunInstallFailedError
oh-my-opencode 需要从远端拉 models.dev。拉不到会报这个错。开 TUN 模式;已经开了就开关一次再试。